Dom Vs. The Machine: Adobe’s New Neural Engine Thoroughly Tested

Colourised wartime photo of my grandfather with other soldiers at call-up, circa 1942. I scanned this photo from an old family album, and having removed all of the dust and scratches, I used Adobe’s Neural Engine to colourise the image.
Recently I have been restoring a lot of old photographs taken by my grandfather and my great grandmother in the 1930s, during the war years and the late-1940s. This has given me the opportunity to jump back into Adobe Photoshop and reacquaint myself with its retouching and image restoration tools, specifically Adobe Photoshop’s venerable Clone Stamp tool, Healing Brush, Spot Healing Brush and Patch Tools. However it was a recent marketing e-mail from Adobe — which normally head straight to the rubbish bin — that caught my attention because it was advertising Adobe’s new image restoration filter which is a part of Adobe’s experimental neural engine collection (see menu, Filter > Neural Filters…).
Now this got my attention because it was billed by the marketing blurb as a ‘one-click’ (or several) way to restore old images. Needless to say I was somewhat sceptical — knowing just how much work and attention to detail needs to be rendered to properly restore an old image — and nervous at the same time because I pride myself on my long practice and developed skills in this area and would not want a piece of technology to simply take all that away from me. So I decided to explore Adobe’s new image restoration filter and its already part-developed image colourisation filter further to see if they are actually a threat to my practice and/or whether they are actually useful tools which I can use to my own benefit. And the following story is my journey through Adobe’s neural engines, the results and my conclusions.

Bosham Channel, from Shore Rd. I restored this landscape taken by my grandfather in the 1930s using Adobe Photoshop’s traditional image restoration and retouching tools, namely the Clone Stamp, Healing Brush, Spot Healing Brush and Patch Tools.
A Bit About The Images I Have Been Restoring
The images I set about restoring were scanned from several old family albums which were compiled by my grandfather when he was alive, and have subsequently been looked after by my mother and uncles. As far as I know, we do not have any of the negatives and many of the albums’ prints were made on scraps of photo-paper in my grandfather’s darkroom (he enjoyed his amateur photography). This meant that in many cases the images had to be scanned and then enlarged; revealing time’s scratches, dust marks and imperfections. Furthermore, many of the images were slightly out of focus, probably because they were taken using small cameras with limiting controls and lenses. But the process was really worth it because the restored photographs are of considerably better quality than the original prints, revealing many lost details and information which can now be shared.
This is a magic of image restoration: being able to take an old image, perhaps one which has become damaged or is of a limiting size, and being able to restore and even enhance that image. Even before we touch upon Adobe’s Neural Filters, it has to be said that we live in wonderful times, where we have a great range of powerful tools available in our digital darkrooms which allow us to restore images like never before.

Colourised photo of my great grandmother in the garden.
Adobe’s Image Restoration Neural Engine
Adobe Photoshop’s image restoration tools have been with us for quite some time, and with the exception of some minor updates and changes, little has changed for years. Venerable tools like the Clone Stamp, Healing Brush, Spot Healing Brush and Patch tools allow us to powerfully restore, reconstruct and enhance old images and photographs. However, the process is time consuming and does take a great amount of care and attention to detail. To properly restore an old image, say one with a great many dust marks and scratches, can take hours of dedicated work by a trained professional.
This is not a new problem, and a process which Adobe has strived to make more efficient for years. Many of the small updates to Adobe’s image restoration tools have been to make the process more predicable, flexible and faster. Whereas several decades ago we only had the Clone Stamp tool available, now we have the Healing Brush, Spot Healing Brush and Patch tools, with their ability of create content-aware fills and automatically select the best sampling points. This however was very much a forbearer of things to come, as it is only in the last several years that machine learning processes have started to become smart enough to semi-automate some of these processes.

The initial results of an image colourised using the Colorize Neural Filter. As you can see the results are patchy, with many areas of the image uncoloured or coloured with the wrong colours. The Neural Filter has however generally done a reasonably good job with the skin tones and the brickwork in the image’s background; but many of the soldiers’ uniforms, which should be dark green or khaki, have been rendered in shades of dark blue!
Several years ago Adobe introduced its ‘Colorize’ filter as a part of the Neural Filters collection. The process takes a black and white image, albeit one which has been converted into an RGB image (see Color Mode in the Image menu), and turns it into a colour image. The process is however not perfect, and as you can see in the image above, the neural engine often choses the wrong colour, particularly with similar shades of grey which take a human eye to understand and choose an appropriate colour.
However, it does a good job rendering skin tones, which are usually one of the trickiest areas to get right in image colourisation. And I would say as a starting point — to be adapted further by a trained professional — the Colorize filter is a tool which will save you several hours of initial work and allow you to focus on the smaller details and finalising the end result.
So when I started exploring Adobe’s new image restoration feature in its neural engine collection I already had some idea, and expectation, that the results might be less than perfect, but that the filter is best used as a tool to get some initial work done. And to be fair, the tool is still in its beta testing phase, where results can be unpredictable and/or the filter’s tools are likely to be changed.
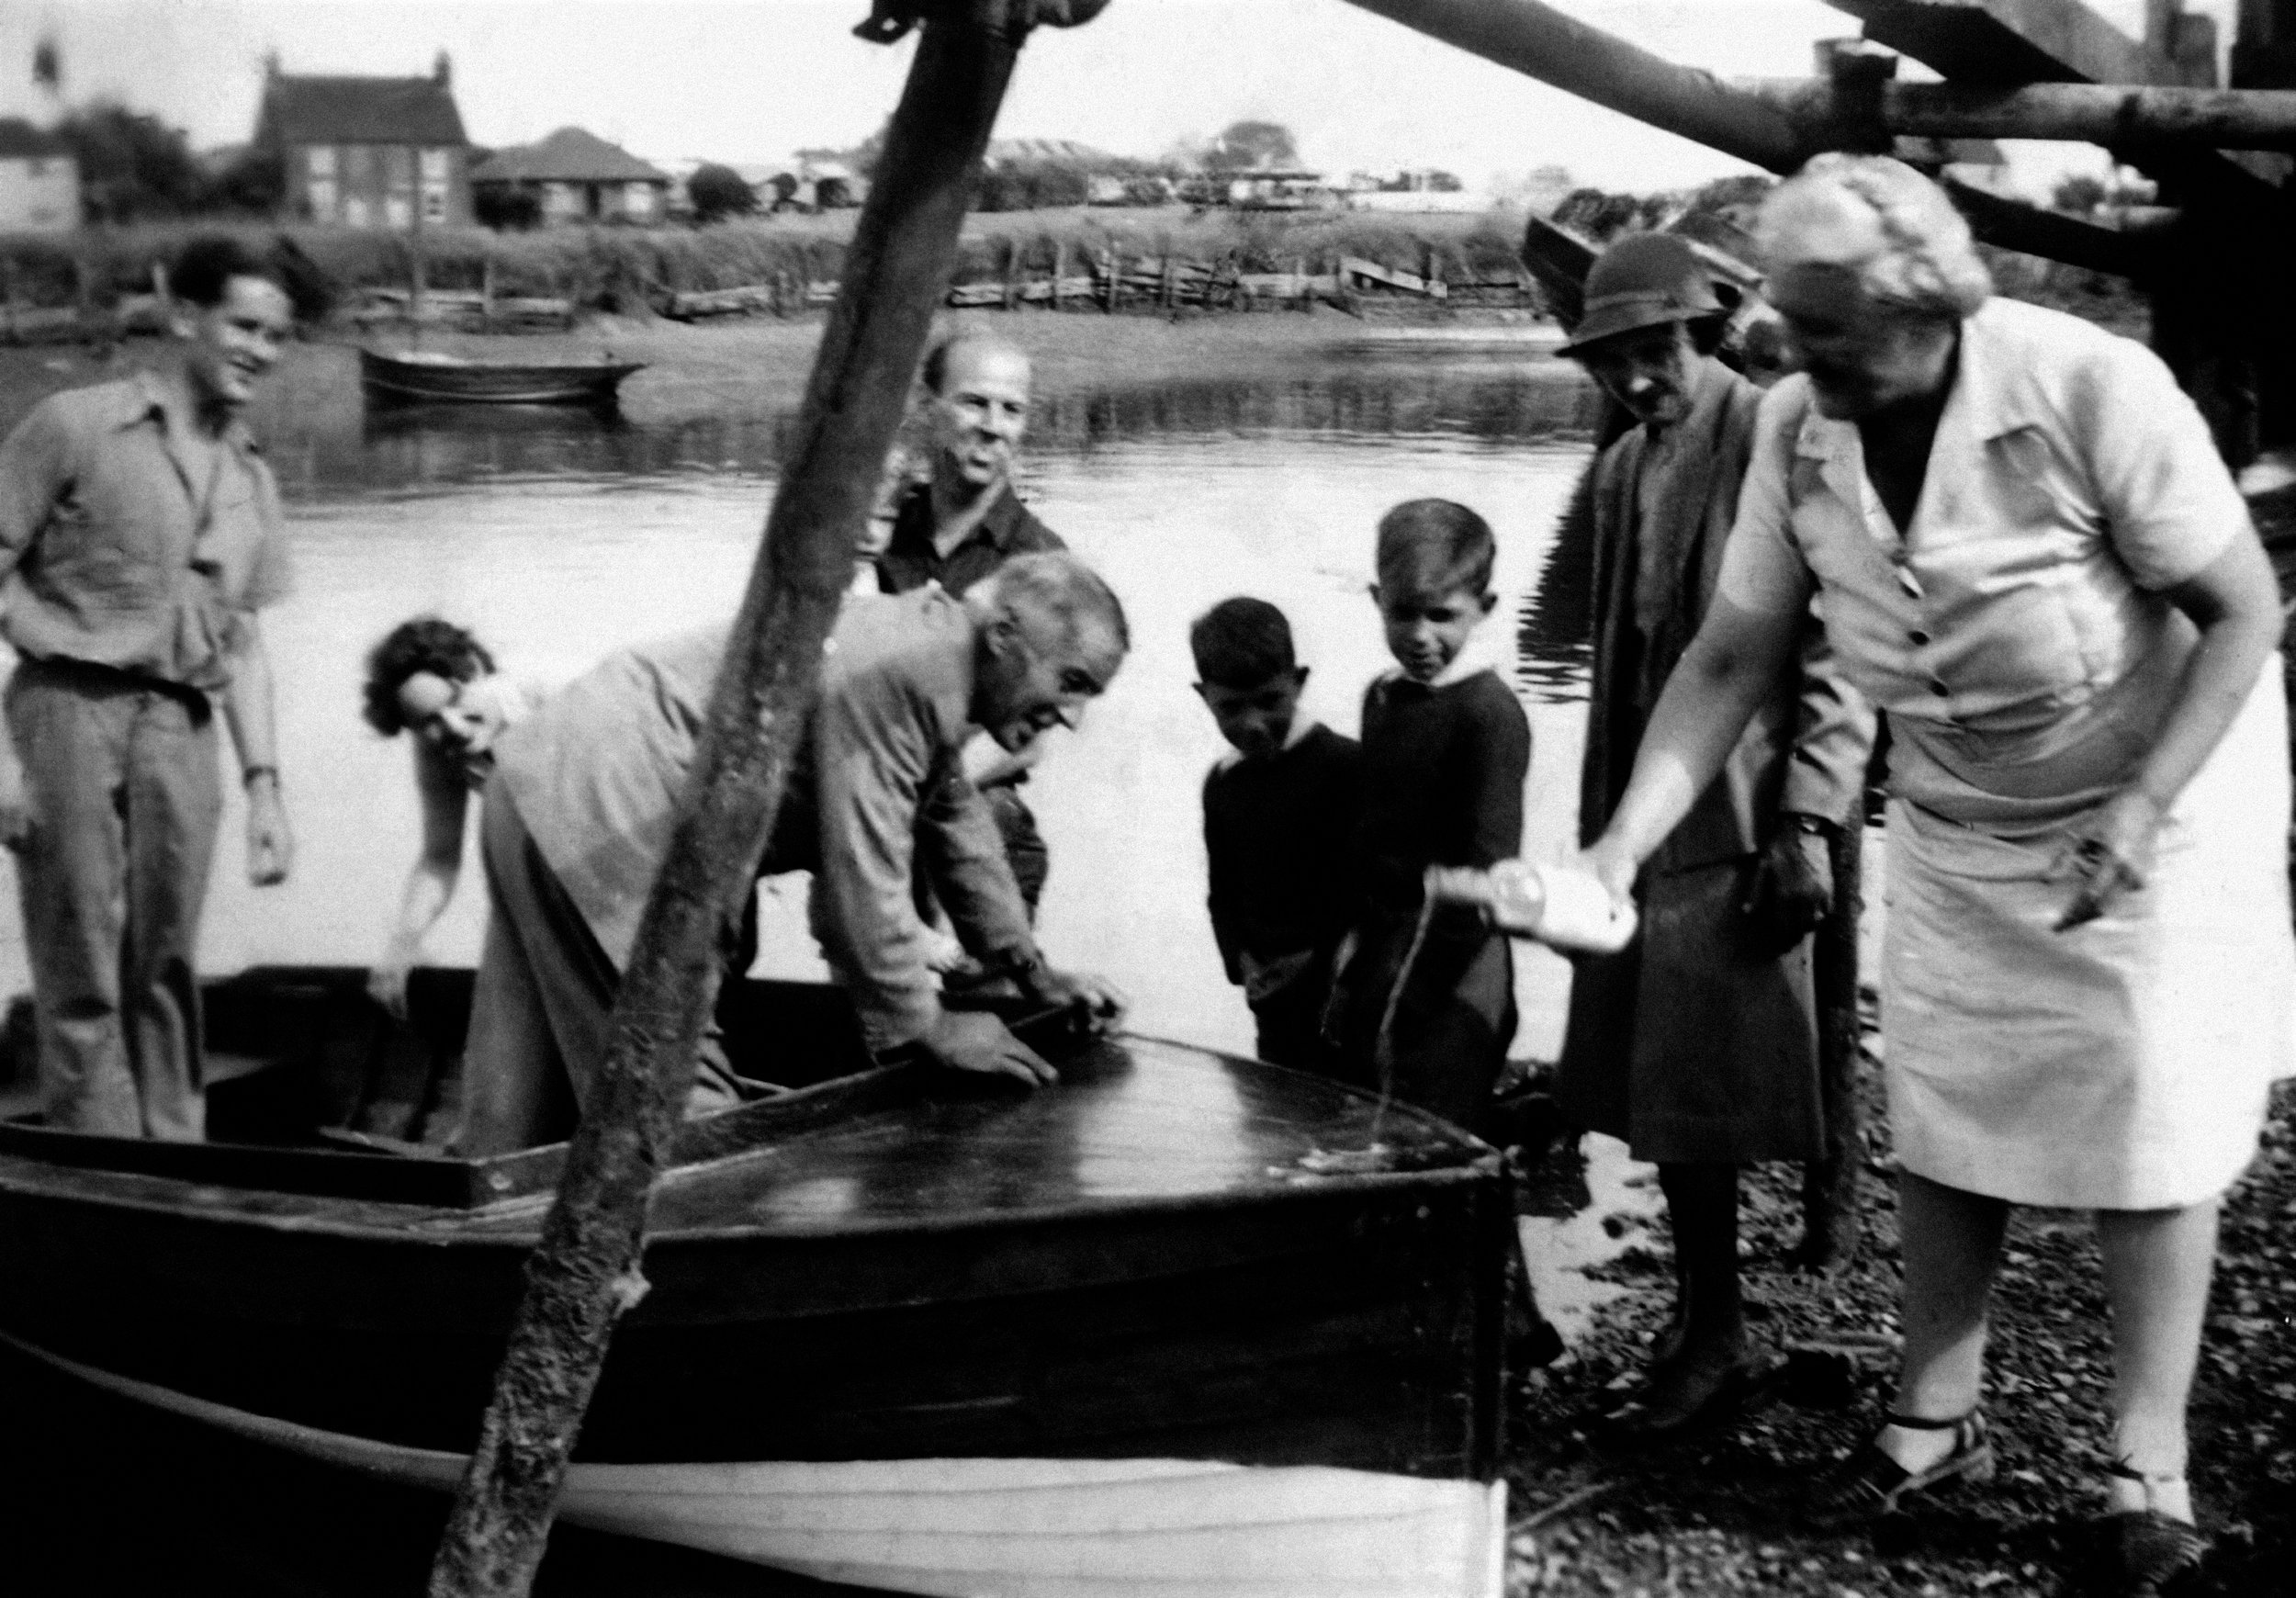
Uncle Pete launching a boat he built, ca. mid-1950s. This was one of the first images I restored using Adobe’s Image Restoration Neural Filter as a starting point. The image was scanned from a very small print and is slightly out of focus. After some tweaking of its settings, the Image Restoration filter did a good job of removing most of the image’s dust marks and scratches. I did have to removed some stronger marks using Adobe’s traditional image restoration tools, but the filter did save me several hours of work.
In my initial experiments using the Image Restoration Filter the neural engine overall did a good job removing the majority of the dust, scratches and image imperfections. However, like Adobe’s non-neural Dust & Scratches filter the results were a fine balance between trying to restore the image, but retain those finer details which really make a photograph. The photographic grain, particularly with older images taken using traditional photographic techniques, is very important and I found that the stronger I made the filter’s effect, the more of these details were removed. So with hindsight, I would conclude that Adobe’s new Image Restoration filter currently works well with image’s that have a softer focus or which lack those finer details.
If however retaining those details is important, then be very careful in how you use the Image Restoration filter because having a too stronger setting will have a drastic effect on your image. I think the key tactic here is balance and use in moderation. Do not use this filter like a bull in a china shop and expect it to produce one-click perfect image restoration jobs, because that is not how it is designed.

Benares, India, during the Second World War, which my grandfather visited whilst serving in the Royal Signals Corps. Because this image has a relatively soft focus I was able to use the Image Restoration filter to remove most of the dust and scratches. I did have to remove some lingering marks manually afterwards, but the neural engine made the whole process relatively quick and painless.
If you would like to learn more about image retouching, restoration and colourising old photographs, don’t hesitate to check out my classes Beginner’s Guide to Retouching Old Photographs in Adobe Photoshop (available on Skillshare and Teachable) and Beginner’s Guide to Colorizing Old Photographs in Adobe Photoshop (available on Skillshare and Teachable).
